
BUT before I jam the pictorial let me enlighten thee on my take of the shock bungie. First, of all names given to this device "shock" is the least acceptable in my book, why??? cause in most cases by the time your spearfishing shaft reaches the end of the wraps it hardly has any more smack, penetration, power, force....well you get it. Second, ideally the less you have going on between your speargun, line, and spearfishing shaft, the less chance of something going wrong...so yeah if you can make do without a spear gun bungie then go for it..."Less is more"...true that! And yes their are other type of spearfishing "line retention" methods that at one point or another I'll be blogging on with a saweeet pictorial for the picture happy spearos. Third, if you insist on a bungie then try to make/buy one as streamlined as you can and fasten it to your line anchor...alot of spearos are always tweeking their spear guns, for optimal power and distance, to later have a huge piece of rubber halfway between the line and shaft. And finally the main reason why you should consider a bungie is to keep your line tight to the stock, this both lessens tangles and more importantly prevents it from getting caught to your self or bottom structure-that said a small, swiveless, bungie should suffice... and this is my take on the spearfishing muzzle bungie

Give yourself ample line to work with- for a 3" rubber I use about 15" of line, as you can always cut the excess. Double up the spectra (dyneema) spearfishing line (at this point make the call whether you want to use a swivel or not if you do I'd recommend these http://www.basspro.com/webapp/wcs/stores/servlet/Product_10151_-1_10001_8555____SearchResults
and make

a simple overhand knot. Alot of the Miami guys I go spearfishing with think I'm a knot guru, but truth be said I'm knot, er, um I mean I'm not, I just simply dip over to this site http://www.animatedknots.com/indexfishing.php?LogoImage=LogoGrog.jpg&Website=www.animatedknots.com

a simple overhand knot. Alot of the Miami guys I go spearfishing with think I'm a knot guru, but truth be said I'm knot, er, um I mean I'm not, I just simply dip over to this site http://www.animatedknots.com/indexfishing.php?LogoImage=LogoGrog.jpg&Website=www.animatedknots.com
and whalah!

OK still with me? This next step is vital, after your knot get some "super glue" you know, the strong smelling watery type glue that sticks your fingers together...yeah yeah that one....and add a few drops to your knot, this little step goes a long way, as it virtually welds your dyneema spearfishing line on to itself- In fact, I put a few drops of super glue on EVERY knot I tie thats gonna see water

ok so now you got your first knot done and you proceed to the next knot which is on the other end of your line, here you do the exact same function as above and you nip off the excess line here is a picture of your spearfishing bungie half way through the process

EDIT ok heres a better pic. So now you have your 2 loops and next you attach some whipping line (also called rigging twine) to one of the loops this will ease running your dyneema spearfishing line thru the rubber tube in the next step
Moving right along, next you get some liquid soap and dip your spectra line in it this eases the entire process, as a close spearo friend says "lubrication, rules the nation". You then proceed to thread the whipping line (which is waxed allowing you to straighten it out) through the rubber tube and pull the spectra spearfishing line through to the ot her side....wondering where to get that whipping line....here you go compadre http://www.meltontackle.com/products/heavy-duty-waxed-rigging-thread.html
 her side....wondering where to get that whipping line....here you go compadre http://www.meltontackle.com/products/heavy-duty-waxed-rigging-thread.html
 once thats done you set up a couple of constrictor knots, here's another another cool site for the Miami spearo or for that matter any other spearfishing person that would like to be up to date on the best knots for spearfishing


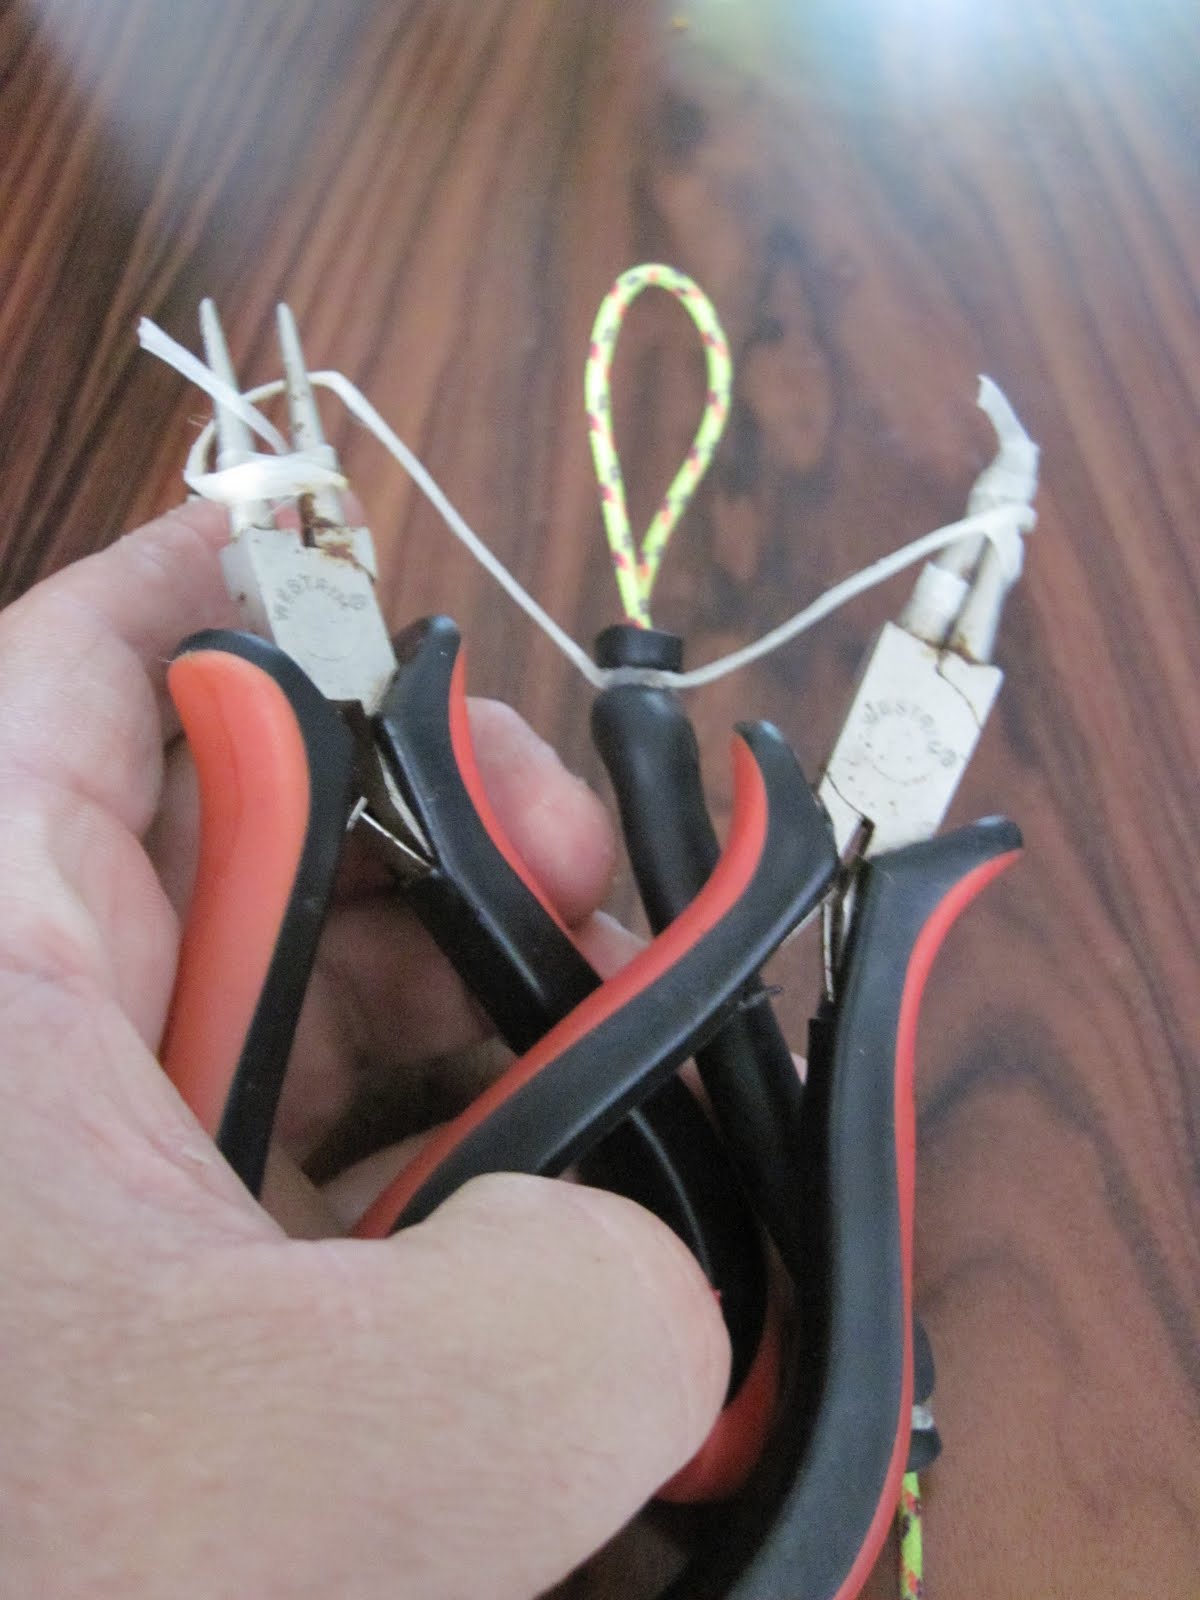
Pull the rubber tubing over one end of the dyneema loop knot and constrict it. I use two needle nose pliers for maximum torque, same goes when I tie my bands

You'll have some rigging twine left over you can do another constrictor or just nip off the excess

And here you have it...neat and purdy like, next you move on to the other side of your dyneema loop. Here it gets just a tad bit tricky ideally you'd like a third hand to help out, as in this way its one simple fluid move, but if a third ain't happening then just proceed without. First slip your second constrictor knot over the rubber tube and let it hang loosely there (in the picture on the bottom left you can't see it but its there on the bottom half), 

next pull the rubber tube this allows the spectra line to "creep" into the tube, and generally stays well within it up to where the knot is. To get the knot in get those needle nose pliers, pinch the knot with them and cram them in, the dish soap we aid in this step
Slip your constrictor knot over the tube and constrict away...............then nip the excess, as so neatly, shown above. So their you have it a spearfishing bungie worthy of many an outing in any spearfishing adventure near or far!

Till next spearfishing report, tight bands, straight shafts, and smooooooooth triggers!
Tone


No comments:
Post a Comment